
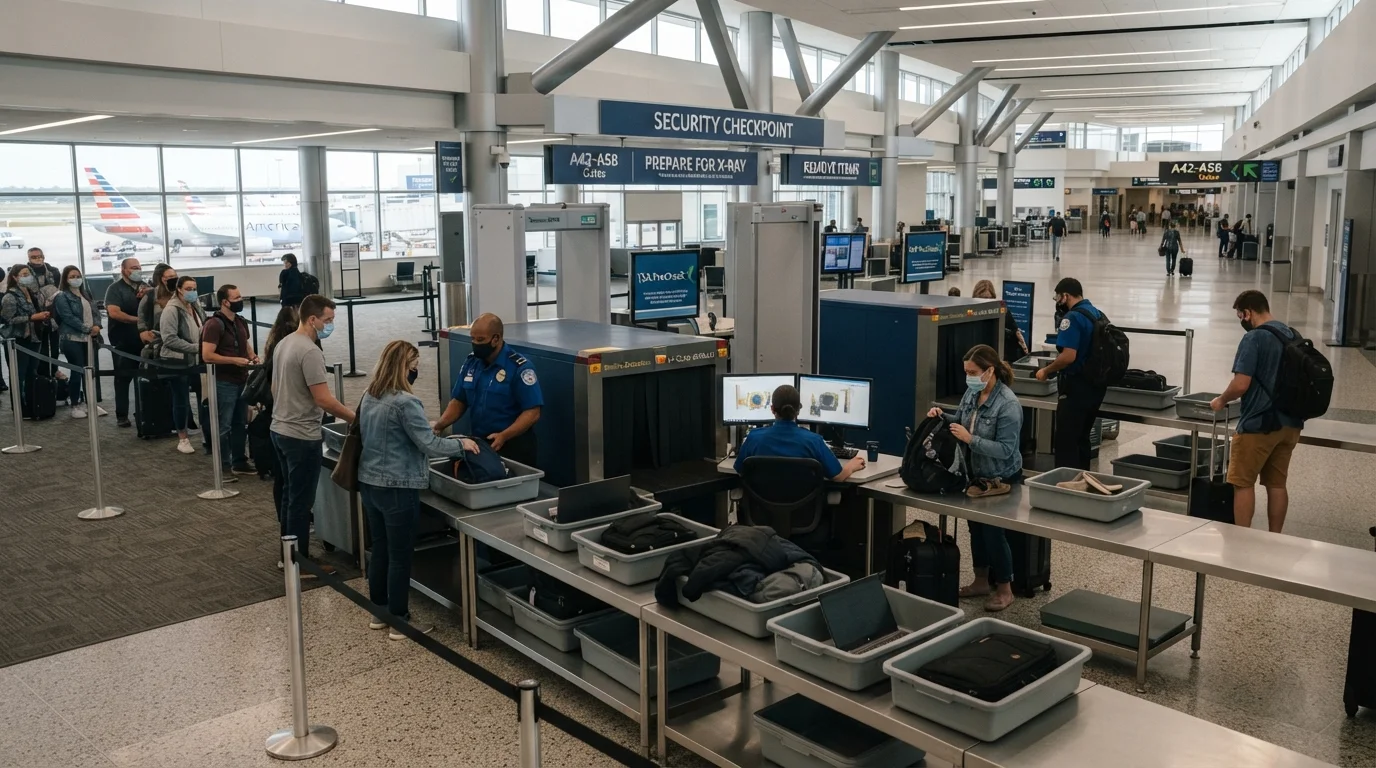
What to Expect Before You Reach the Lane
Airport security in the United States is managed by the Transportation Security Administration (TSA) for domestic and departing international flights. Understanding the process before you arrive eliminates most of the guesswork — and most of the delays.
Before joining the queue, have two things in hand: a valid, government-issued photo ID (or passport for international travel) and your boarding pass — either printed or displayed on your phone. An officer will verify these at the document-check podium before you proceed to the screening lanes. For a breakdown of everything on that boarding pass, see Decoding Your Boarding Pass.
If you have medications, medical devices, or other items that may require extra attention, review the relevant guidance in advance. Our article on Travelling With Medications covers what to carry and what to tell officers.
What you will need
Step-by-Step Through the Checkpoint
The steps below reflect standard TSA procedures at most U.S. airports. Specific airports or terminals may vary slightly; always follow posted signs and officer instructions on the day of travel.
Join the correct lane and present your documents
Look for signs indicating standard lanes, TSA PreCheck lanes, or CLEAR lanes. If you are enrolled in TSA PreCheck, use the dedicated PreCheck lane — you will skip several removal steps. Present your ID and boarding pass to the document-check officer. Your ID must be REAL ID-compliant (marked with a star) or a passport for domestic air travel, per federal requirements phased in by the TSA.
Place items in bins on the conveyor belt
Grab one or two gray plastic bins from the stack. Place the following items in bins — not loosely on the belt:
- Laptop and tablets larger than a standard paperback — each in its own bin, lid open, nothing on top
- Quart-sized liquids bag — placed on top, visible
- Shoes — remove and place flat in a bin
- Jacket or outer coat — folded and placed in a bin
- Belt, keys, coins, and loose metal items — emptied from pockets into a bin
Your carry-on bag and any personal item go directly on the belt after the bins. Leave your checked bag tag visible if you are carrying it through (though checked bags go through a separate system).
Walk through the body scanner
The standard scanner at most U.S. airports is an Advanced Imaging Technology (AIT) unit — a booth-style machine you step into briefly while raising your arms. It is not an X-ray machine and does not use ionizing radiation. If you prefer not to use it, you may request a pat-down instead; inform the officer before stepping forward.
Wait for the officer's signal before stepping in. Stand on the marked footprints, raise your arms as instructed, and hold still for a few seconds. Step out when directed.
Wait for your bins and bags to clear the X-ray
Watch the belt for your items after walking through the scanner. Officers monitoring the X-ray machine may pause the belt to review an image more closely, or they may pull a bag aside for a manual inspection. If your bag is selected, an officer will ask to open it — you have the right to observe this inspection.
Common reasons for bag pulls include dense packing, liquids outside the quart bag, forgotten items (such as a full water bottle), and certain tools or electronics. Cooperate with officer instructions throughout.
Collect your belongings and move clear of the checkpoint
Once cleared, gather all bins and your bag. Move a few steps away from the belt before repacking so you do not block other travelers. Put your shoes, belt, and jacket back on, return your laptop to your bag, and stow your liquids bag. Do a quick mental inventory: ID, boarding pass, phone, wallet, keys. Then proceed to your gate.
TSA PreCheck Can Simplify the Process
Travelers enrolled in TSA PreCheck generally do not need to remove shoes, laptops, liquids, belts, or light jackets at participating U.S. airports. Enrollment involves an in-person appointment and background check. If you fly several times a year, it is worth looking into the program through the TSA's official website to see whether you qualify.
Common Snags and How to Avoid Them
The majority of checkpoint delays come from a handful of predictable situations: forgotten water bottles, laptops left inside bags, or coins and keys left in pockets. Packing your carry-on with security in mind before you leave home makes a measurable difference. Our companion guide on Things That Slow You Down at Security covers the most frequent culprits in detail.
Overpacked bags are another common cause of secondary screening — an officer may need to open your bag manually if the X-ray image is unclear. Keeping your bag organized and avoiding dense layering of items helps produce a cleaner scan. If you're still deciding what to pack where, Carry-On vs Checked Luggage can help you decide what belongs in the cabin versus your checked bag.
Prohibited Items Can Result in Delays or Fines
Bringing a prohibited item — such as a firearm, self-defense spray exceeding size limits, or certain sharp tools — through a checkpoint is a serious matter and can result in fines or law enforcement involvement. Review the TSA's current prohibited items list at tsa.gov before you pack, especially if you are unsure about a specific item. When in doubt, put it in your checked bag or leave it at home.
Once you clear screening, collect all your belongings before moving away from the belt area. Step to the side if you need to re-pack, put shoes back on, or reorganize — this keeps the lane clear for other travelers. Your pre-flight checklist can help ensure nothing gets left behind.